Thursday, June 16, 2011

Using-What-I-Have-In-My-Fridge/Pantry ...*er*... Applesauce Bran Muffins


I remember my mom making these muffins when I was a kid. I also distinctly remember not liking them. Pretty much at all. Hm. But, I had some raisin bran in the cupboard, and that's what came to mind. The reason it came to mind, was that this particular brand of raisin bran has a tendency to settle. So, when you're pouring out your morning (or midnight, as often is the case around here) bowl, all you get is flakes. Eh, not a fan. And the funny thing is, I don't even like raisins. Unless it's in raisin bran. I think it's the healthy crust of sugar they dose them with. Yea, probably that's it. Anyway, to fix this, I scoop out the first five or six cups of just bran cereal. Then we're left with raisin rich cereal. Aah. But, the dilemma becomes, what to do with the extra bran?
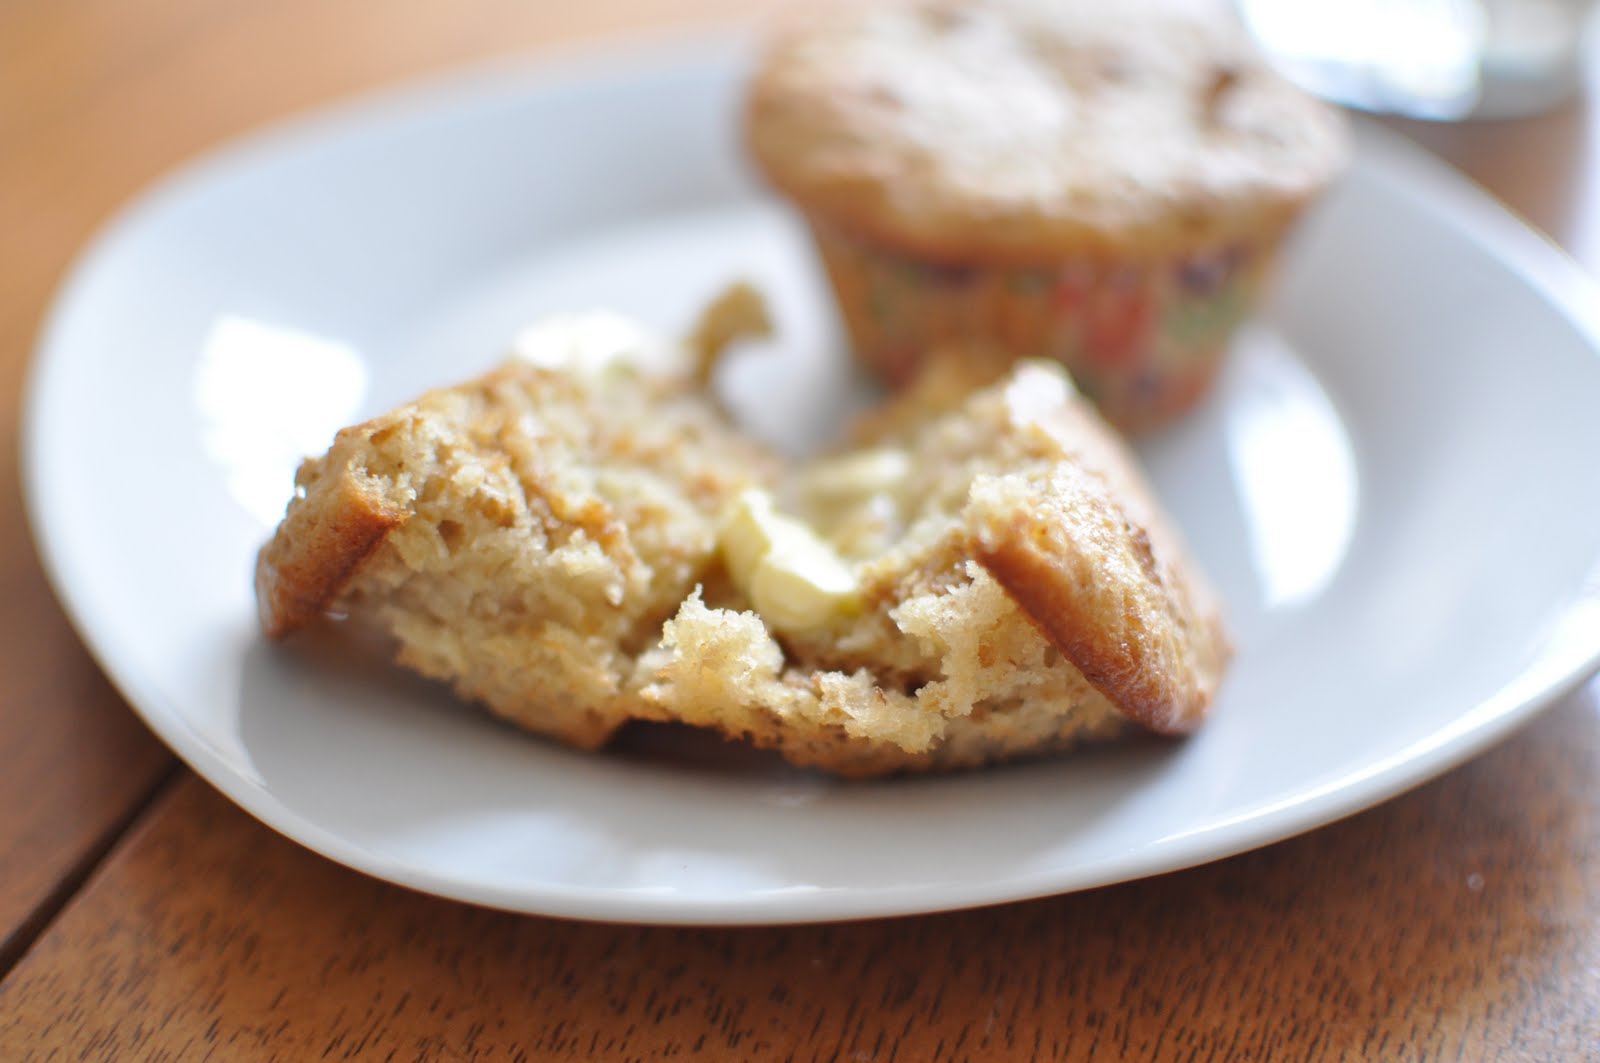
And here we are. I thought that maybe since I've grown up, and my palate has refined somewhat, I would actually like them. And, I'm pretty sure my mom made the with the raisins still in the cereal, and I really. don't like cooked raisins. They get all swollen and mushy...yech. So, I tried it! And guess what? They were sooo good! They were sweet, tender, with a nice crispy top and a good hearty feel to them. With all that bran, they have to be healthy, right? And simple! No crazy swollen raisins or other things to complicate them. I have a sneaking suspicion that the raisins were the only problem the whole time.
These would make a great breakfast, snack, or side for any meal.
You could make them with the raisins (if you're that kind of a person...) or some other dried fruit if you so desire. This batter keeps in the fridge for two weeks. I made a dozen right away, and probably have enough left for two or three more dozen. I ate mine with a generous pat of butter and a cold glass of milk. Yum. Score one for Mom!


Applesauce Bran Muffins
(adapted from this recipe)
  • 1 cup Boiling Water
  • 5 1/4 Cups Bran Flakes, Divided
  • 2-½ cups White Whole Wheat Flour
  • 2-½ teaspoons Baking Soda
  • 1 teaspoon Salt
  • ¼ cups Vegetable Oil
  • 1/2 cups Applesauce
  • 2 whole Large Eggs
  • 2 cups Buttermilk
  • 3/4 cups Brown Sugar
  • 3/4 cups White Sugar


In heatproof bowl, pour boiling water over 1 3/4 cups bran flakes. Set aside until cool (roughly 30-45 minutes).

While cereal mixture cools, combine flour, baking soda and salt into a large mixing bowl.

Add vegetable oil and applesauce to the cooled cereal mixture. In another bowl, whisk together eggs, buttermilk and sugars. Add this to the flour mixture and combine. Stir in the remaining dried cereal and, finally, add the water/bran/oil mixture to everything and combine well.

Place batter in large plastic container, cover, and let sit overnight in the refrigerator.

Preheat oven to 375ºF. Lightly spray or grease muffin cups and fill in as many cups as desired. Batter can sit in the fridge for up to two weeks. Fill cups with approximately 1/4 cup batter and bake for 20-25 minutes, or until an inserted toothpick comes out clean.


Tuesday, June 14, 2011

Cheating...

Hm. This may be kind of cheating...but what is the point of a blog if you can't post whatever you want, right? Right. Anywho...we have discovered a fabulous deal at Popeye's Chicken and Biscuits (which we looooove!)
We first fell in love with Popeye's several years ago, when we were visiting Pittsburgh, PA and needed a quick, cheap place to eat. We've been hooked ever since! They have fabulous, affordable fried chicken and TO-DIE-FOR biscuits. I could buy a dozen of their biscuits and eat them for a meal of their own. Mmm.
Anyway, we found a fantastic, budget friendly (very!) deal on Tuesdays.
Every Tuesday they have a special of 99 cents for a leg and a thigh. Sounds like a pretty cheap and delicious meal to me! Throw in a few biscuits for each of us, and we can have dinner for just over four bucks. Only two if we have the self control to skip the biscuits...but I can't. Do I ever love their biscuits.
Tuesday suppers are officially taken care of indefinitely!

Saturday, June 11, 2011

A Better Corn Bread


Just a quick post today! You all should try Paula Deen's recipe for Hoecakes.
So.So. GOOD. It's like fried little clouds of corn bread. Crispy, buttery, fluffly...try it with butter and honey. Mmmm.

Ingredients

  • 1 cup self-rising flour (*I actually used pancake mix for this)
  • 1 cup self-rising cornmeal, or from a mix (*I just added a tsp. of baking powder to my cornmeal)
  • 2 eggs
  • 1 tablespoon sugar
  • 3/4 cup buttermilk
  • 1/3 cup plus 1 tablespoon water
  • 1/4 cup vegetable oil or bacon grease
  • Oil, butter, or clarified margarine, for frying

Directions

Mix well all ingredients, except for the frying oil. Heat the frying oil or butter in a medium or large skillet over medium heat. Drop the batter, by full tablespoons, into the hot skillet. Use about 2 tablespoons of batter per hoecake. Fry each hoecake until brown and crisp; turn each hoecake with a spatula, and then brown the other side. With a slotted spoon, remove each hoecake to drain on a paper towel-lined plate. Leftover batter will keep in refrigerator for up to 2 days.

Friday, May 27, 2011

Sweet Potato Pancakes

Ok, so I realize It's been a rather long time since I've posted...but, in my defense, I do have a rather good excuse... : )


Little Miss is seven weeks old! And I suppose it's about time for me to get back into this blog.

When I was a kid, my mom used to make the most magnificent Mashed Potato Pancakes. I loooved them. I've bugged her and bugged her over the years for the recipe. Somehow, I never got them. Finally, a few months ago, I heard my little brother bragging about how he had made potato pancakes for supper...wait, what?? How unfair. ; ) Finally, after much complaining about this injustice, I got the recipe! I started making Mashed Potato Pancakes like nobody's business. One night we had mashed sweet potatoes, and had some leftovers. Lightbulb! So, I substituted mashed sweet potatoes for the regular mashed potatoes. Brilliant! I'm not a huge fan of maple syrup, but I found a recipe for Essential Buttermilk Syrup that is just lovely. It goes great with the sweet potatoes. Enjoy!


Mashed Potato Pancakes


1 cup of mashed potatoes (regular or sweet- see recipe for mashed sweet potatoes here)
1 egg
1/2 cup of flour
1/2 tsp. baking powder

Mix all ingredients. Batter will be very thick.


You should be able to scoop the batter into a patty. You may have to adjust the flour depending on the thickness/thinness of your potatoes. Scoop batter into a buttered skillet and flatten with a spatula. Cook until golden brown on both sides. Serve with butter and Essential Buttermilk Syrup.

Tuesday, March 22, 2011

Cool and Creamy


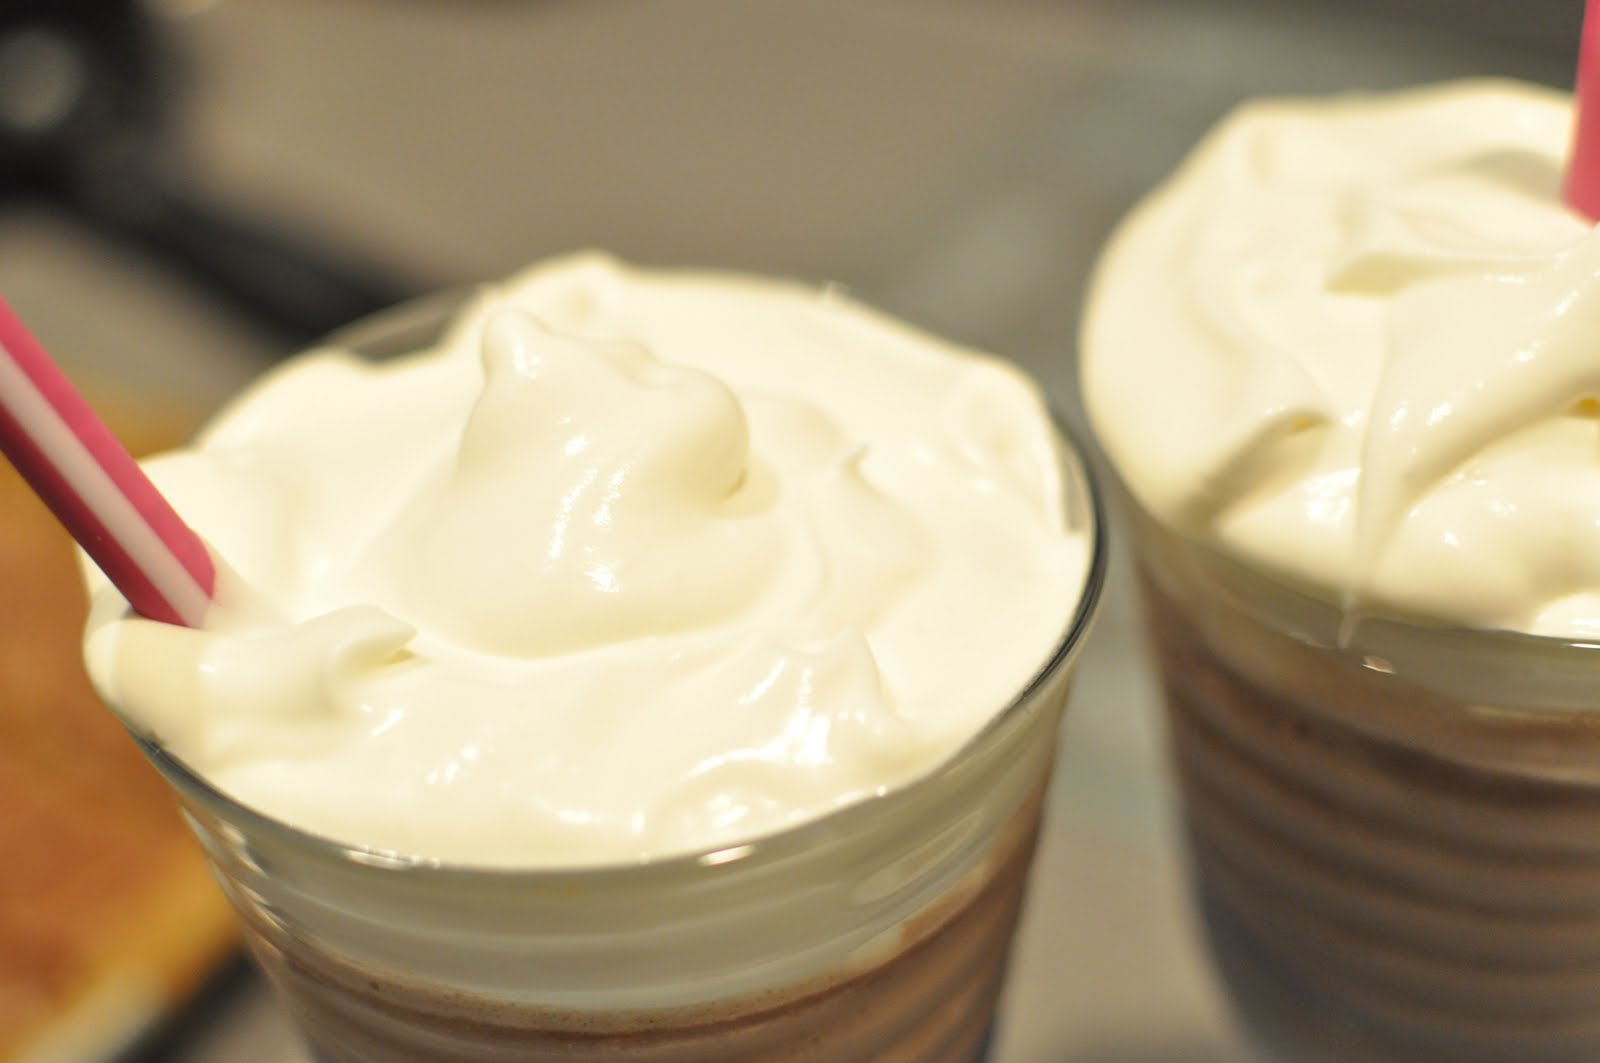
Today I'm just going to pass along a cool and creamy treat I came across awhile ago, Frozen Hot Chocolate. My hubby loves it, and it's relatively uncomplicated. It's cool, creamy, and satisfying. A nice frosty treat for a warm spring evening. Enjoy!

Frozen Hot Chocolate (original recipe found here)

  • 3 Tablespoons Granulated Sugar
  • 1 package Hot Cocoa Mix (about 3 Tablespoons)
  • 2 Tablespoons Unsalted Butter
  • ⅓ cups Semi-Sweet Chocolate Chips
  • ⅓ cups White Chocolate Chips
  • 12 ounces, fluid Can Evaporated Milk, Divided
  • 4-½ cups Ice
  • Whipped Cream, To Taste
  • Mini Marshmallows, To Taste

Combine sugar, cocoa mix, and butter in the top of a double boiler that is set over gently boiling water. Stir often until melted and a smooth paste forms. Add semi-sweet & white chocolate chips; stir. When chips begin to melt, slowly stir in 1/2 cup of evaporated milk. Stir until smooth. Cool to room temperature.

Combine the chocolate base mixture, the remaining evaporated milk and ice in a blender (you can do this in batches) and cover. Blend until smooth. Pour into frosty glasses. Top each with whipped cream. Sprinkle with additional chopped chocolate chips & mini marshmallows, if desired.

Saturday, March 19, 2011

My house smells like Buttermilk Banana Bread...

As you may know, ever since we moved to Colorado, I've had an epic battle raging with the altitude. Nothing that should come out really does. Recipes that have never given me a moment's trouble, suddenly refuse to rise. Cookies spread, cakes fall, breads remain dreadfully dense. You get the idea. One thing I've had particular trouble with is finding a good banana bread recipe. I love myself a great piece of banana bread, so I've been really bummed by this.
But guess what? I've finally won a round! I found a banana bread recipe that is to die for. And it doesn't fall and get all gooey and weird...yesssss! Score one for me! We won't talk about what Altitude's current score is...


This banana bread is lighter in both color and texture than most. I love the golden crust it develops, as well as the delicate interior. It's fluffy and delightful. Mmmm.


Buttermilk Banana Bread, from Two Peas and Their Pod

Recipe adapted from Mel’s Kitchen Cafe


1/2 cup butter, softened
1 cup of sugar
2 large eggs
1 cup mashed bananas (3 medium sized bananas)
4 tablespoons buttermilk
1/2 teaspoon vanilla extract
1 3/4 cups all-purpose flour
1 teaspoon baking powder
1/4 teaspoon salt
1/8 teaspoon baking soda

1. Grease and flour 1 large loaf pan (9 1/4 X 5 1/4-inch) or whatever combination of pans you’d like. I used a mini loaf pan and a 8 1/2 X 4 1/2 loaf pan. You can also make banana muffins with this recipe, if you wish. Set pans aside.

2. In the bowl of a stand mixer, cream butter and sugar together. Add eggs, mashed bananas, buttermilk, and vanilla until the batter is well mixed.

3. Add in the flour, baking powder, salt and soda. Mix until well combined. Divide batter into greased and floured pans and bake at 350 degrees for 50-55 minutes or until a toothpick comes out clean.

4. Let bread cool on a wire rack for 15 minutes. Loosen the bread with a knife and carefully remove from pan. Finish cooling on rack. Slice and serve once cooled.

Thursday, March 3, 2011

Uh, yum!


So I'm gonna keep this short. I may have found the best chocolate chip cookie recipe. It's so beyond good. It has a deep toffee flavor, because of the extra brown sugar in the recipe, and it has a very delicate salty background, due to the sea salt instead of table salt. I love it. They did come out a little flat, most likely due to the altitude, but they were still deliciously chewy. Love them. Try them out sometime!


*Recipe taken from Savory Sweet Life blog*


Alice’s Chocolate Chip Cookies

Makes approx. 45-48 cookies using a sm-med 2tbl. cookie scoop

INGREDIENTS:

1 cup (2 sticks) salted butter, softened

1/2 cup sugar

1 1/2 cup packed brown sugar

2 eggs

2 tsp. vanilla extract

2 3/4 cups (12 oz) all-purpose flour *If at all possible, please weigh the flour

3/4 tsp. smallish-medium coarse sea salt *please do not use table salt, the sea salt gives the cookies a nice flavor and hints of texture. If you only have table salt, use 1/2 tsp. *When using sea salt, you will get small crunchy flecks of salt when you bite into the cookie. If you do not like this taste, go with 1/2 teaspoon of table salt.

1 tsp. baking soda

1 1/2 tsp. baking powder

2 1/4 cups semi-sweet chocolate chips *I realized grocery stores sell bags of chocolate chips in 12 oz bags but this recipe really needs every last chip. Otherwise you’ll get cookies with only a few chips in each one and this recipe requires lots of chocolate to bulk the cookie up. You’ll need about 1 1/2 bags.

DIRECTIONS:

Preheat oven to 360 degrees. Cream butter, sugar, and brown sugar until it is nice and fluffy (approx. 3 minutes on medium-high speed on a K-5). Add both eggs and vanilla and beat for an additional 2 minutes. Add baking soda, baking powder, salt, and flour until cookie batter is fully incorporated. Finally add chocolate chips until well distributed. The cookie batter should be somewhat thick. Drop about 2 tablespoons of dough or use a medium cookie scoop and plop the batter onto a baking sheet lined with parchment paper. Bake for 12-14 minutes until the edges are nice and golden brown. Remove from heat and allow the cookies to stay on the cookie sheet for an additional 2 minutes. Pick up the parchment paper with the cookies still on top and transfer to a cool non-porous surface. Allow the cookies to cool on the paper for at least 3 minutes before serving. Enjoy!